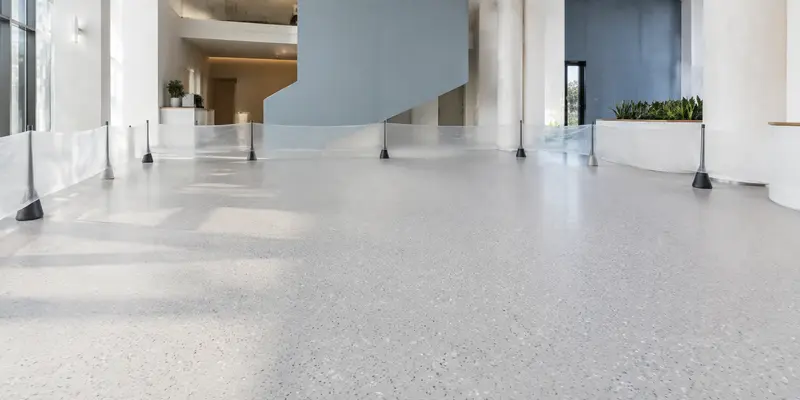
Resin Floor Peeling and Delamination: Causes, Repair, and Prevention
Resin floor peeling occurs when the coating system can no longer remain bonded to the concrete or to another layer within the system. The visible damage may be a lifted edge, a hollow area, a blister, scattered flakes or an entire sheet of flooring separating from the slab. Although the symptoms look similar, the underlying failures are not the same.
Moisture may be pushing from below. The coating may have bonded to laitance, dust, oil or an old sealer instead of sound concrete. The concrete itself may be weak. A primer or intermediate layer may have cured beyond its recoat window, or the resin may have been mixed and applied outside the permitted conditions. Traffic usually exposes these weaknesses; it is not always the original cause. Different resin flooring systems also have different substrate, primer, recoat and environmental requirements, so a repair method should never be selected from the surface appearance alone.
The safest response is therefore not to coat over the damaged area immediately. First identify the failure plane, confirm the substrate and moisture condition, and determine how far the loss of adhesion extends. Only then can the project team decide between a controlled local repair and full system removal.
Resin Floor Peeling and Epoxy Floor Delamination: What Failed?
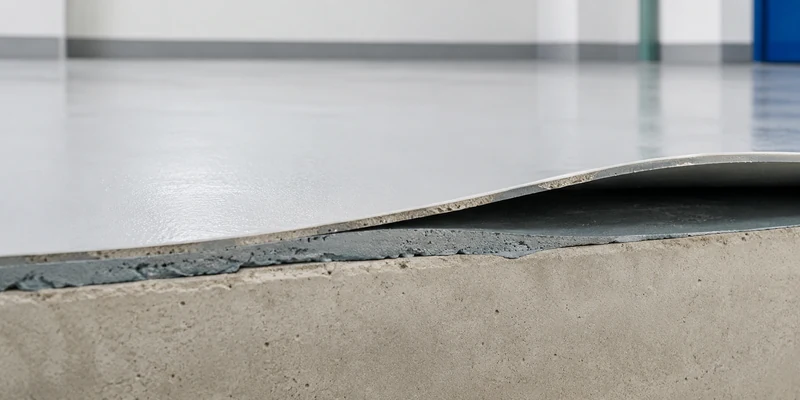
“Peeling” describes what is visible. “Delamination” describes separation between layers. An epoxy floor delamination may occur between the concrete and primer, between two resin coats, within a weak layer of concrete, or within the coating system itself. This distinction matters because every repair inherits the strength of the layer left below it.
If a lifted piece leaves clean, smooth concrete with little material attached to its underside, the original floor coating adhesion failure probably occurred at the substrate interface. A coating fragment covered with fine grey powder suggests that the resin bonded to laitance or a dusty surface layer. If sound-looking concrete is attached to the coating, the bond may have been stronger than the concrete surface; the weak substrate, rather than the resin-to-concrete interface, failed cohesively.
Separation between two resin layers points to a different problem. The earlier coat may have been contaminated, left too smooth, exposed to condensation or recoated outside the permitted interval. Soft, tacky or easily indented material indicates incomplete cure and should not be treated as a normal adhesion repair. A strong solvent-like or unusual odor, unmixed streaks and variable hardness across the same batch area also justify checking mixing and application records.
Floor Coating Adhesion Failure: Diagnose the Break Surface First
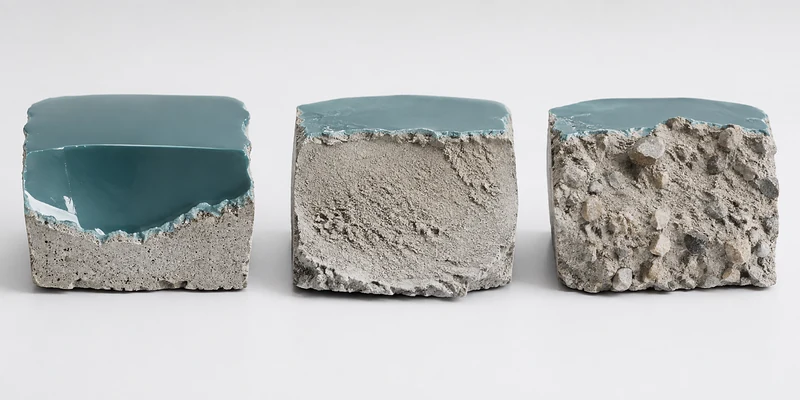
The lifted material and exposed floor provide more useful evidence than the top surface alone. Inspect representative locations rather than only the first visible edge, because hollow or poorly bonded flooring may extend beyond the area that has already opened.
| Observed condition | Likely failure mechanism | What to check | Repair implication |
|---|---|---|---|
| Clean coating underside and smooth exposed concrete | Insufficient profile, sealer or incompatible surface | Preparation method, porosity, old treatment and pull-off results | Remove back to a sound, mechanically prepared surface |
| Fine powder or weak cement paste on the coating | Laitance, dust or weak surface concrete | Scraping, surface hardness and fracture material | Continue removal until strong concrete is exposed |
| Concrete firmly attached to the peeled resin | Cohesive failure within the concrete | Concrete strength, pull-off failure mode and depth of weakness | Repair or rebuild the weak substrate before recoating |
| Resin visible on both sides of the separation | Intercoat delamination | Recoat time, sanding, dust, condensation and layer compatibility | Remove the weak layer and restore the approved intercoat preparation |
| Damp blister, whitening or mineral deposits | Moisture under epoxy or rising slab moisture | Moisture tests, drains, leaks, damp-proof course and seasonal pattern | Resolve the moisture source and obtain an approved mitigation design |
| Local dark or oily areas | Deep contamination | Degreasing trial, grinding depth and contamination history | Remove contaminated material; surface cleaning alone may be insufficient |
A tap survey can help map hollow areas, while adhesion testing can show the weakest plane. ASTM D7234-22 is used to evaluate pull-off adhesion of coatings on concrete, but the numerical result should always be recorded with the fracture location. A high value ending in weak concrete still means the remaining slab surface requires attention. Photographs of both sides of the fracture, test locations and the spread of hollow areas make later repair decisions more reliable.
Epoxy Floor Substrate Moisture and Moisture Under Epoxy
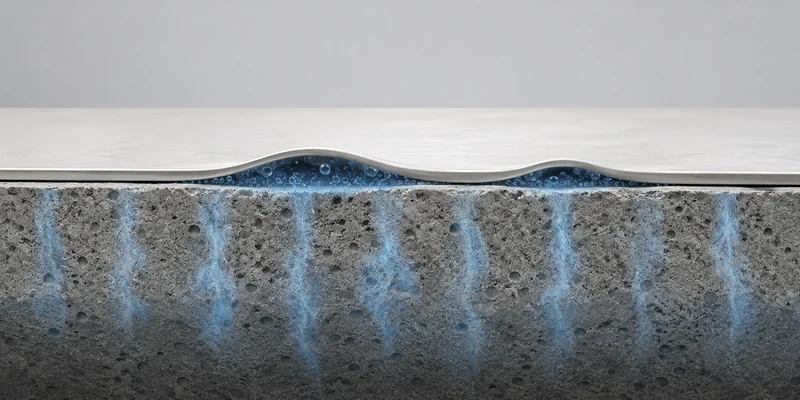
Concrete can look dry while moisture is still moving through it. In a slab-on-ground, below-grade floor, repeatedly washed area or building with damaged damp-proofing, vapor may reach the underside of a relatively impermeable epoxy floor coating. The result may begin as whitening or bubbles in epoxy floor areas and later develop into widespread lifting. However, not every bubble is caused by rising moisture; air release from porous concrete and mixing or application air can create a different defect. The timing, distribution and contents of a blister must be considered.
Epoxy floor substrate moisture should be evaluated before installation and again when diagnosing a failed floor. Readings should cover several locations, especially near drains, external walls, cracks, repaired zones and areas where failure is concentrated. An in-situ relative-humidity test and a surface moisture meter do not measure the same property, so their values should not be treated as interchangeable. ASTM F2170-19a covers in-situ relative-humidity testing in concrete slabs and makes clear that test results represent the slab condition at the tested locations and time. Test method, date, location, slab condition and product acceptance limit all belong in the project record.
For the current DIMERY polymer terrazzo system, the product instructions reference substrate moisture below 8%. They also require relative air humidity below 80% and a substrate temperature at least 3°C above dew point. These are separate controls. A surface that passes a moisture reading can still develop condensation if the substrate temperature approaches the dew point during application. Where active rising moisture, a leak or hydrostatic pressure is suspected, applying another standard coat is not a repair. The source must be corrected, and any moisture-control system must be confirmed as compatible with the complete flooring build-up.
Substrate Preparation for Epoxy Flooring and Resin Floor Adhesion
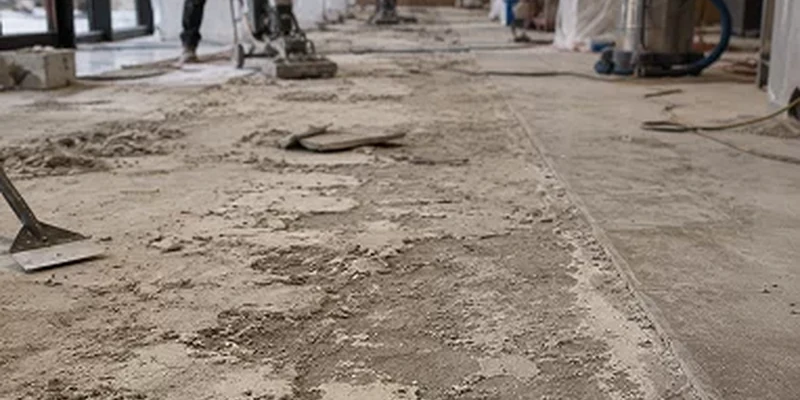
Reliable substrate preparation for epoxy flooring does two jobs: it removes the weak or contaminated surface and creates a profile that the primer can wet and anchor into. Grinding or shot blasting should expose sound concrete, not merely scratch an existing sealer, old paint or brittle cement skin. Corners, wall lines, columns and equipment bases require the same preparation standard as open areas; otherwise delamination often appears first where large machines could not reach.
Contamination needs its own decision. Dust left after grinding forms a separation layer and must be thoroughly vacuumed. Oil, silicone, wax, curing compounds and old sealers can remain in pores even when the floor looks clean. Where oil has penetrated deeply, repeated surface washing may only draw more contamination upward. Removal and replacement of affected concrete may be safer than relying on a stronger primer.
Substrate strength is equally important. For the current DIMERY reference conditions, concrete compressive strength should be at least 25 MPa and pull-off strength at least 2.0 MPa. New concrete should cure for at least 28 days, flatness deviation should be no more than 3 mm under a 2 m straightedge, and mechanical preparation should achieve the specified CSP 3-6 profile. These values are product-system requirements, not universal limits for every resin product. A different system must be checked against its own technical data and project specification.
Epoxy Floor Peeling from Mixing, Primer, and Recoat Errors
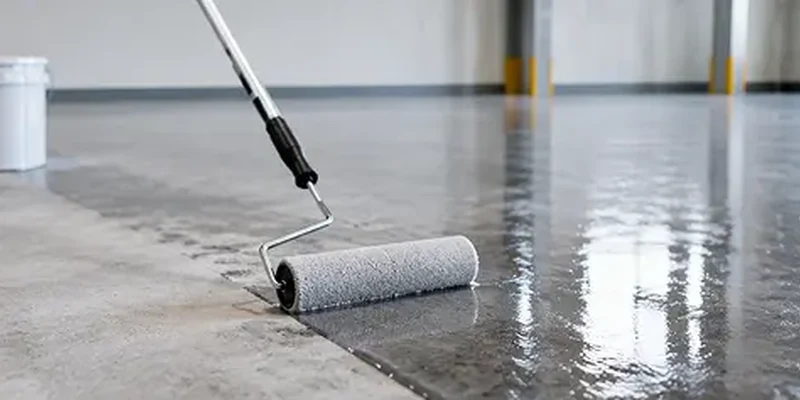
When the substrate is sound and dry, epoxy floor peeling may originate in the installation sequence. A primer applied too thinly, unevenly or over residual dust can leave porous or unbonded zones. A primer that has cured into a smooth surface may require approved mechanical preparation before the next layer. Simply adding more finish cannot restore an interface that never developed adequate adhesion.
Two-component materials depend on the correct resin-to-hardener ratio and complete mixing. Splitting packs by eye, scraping poorly mixed residue from the sides of a container onto the floor, adding unapproved thinner or installing material after its working time can produce local soft spots and variable cure. DIMERY’s current instructions require full-pack mixing, no added thinner and a working time of approximately 15-20 minutes at 20°C. Material should be conditioned at 20-25°C before mixing, and the specified addition sequence and mechanical mixing procedure should be followed.
Environmental control continues after application. DIMERY references a substrate temperature of 15-35°C, with 20-25°C preferred, and prohibits installation outside the stated range. High humidity, a cold slab near dew point, direct strong airflow or premature exposure to water can interfere with the surface and layer bond. Traffic introduced before adequate cure can turn a small weak edge into epoxy floor peeling off across a larger zone. Under the referenced conditions, the surface should remain protected from foot traffic during initial set, while complete cure may take approximately three to seven days depending on temperature and humidity.
How to Repair Epoxy Floor Peeling and Delaminated Resin Flooring
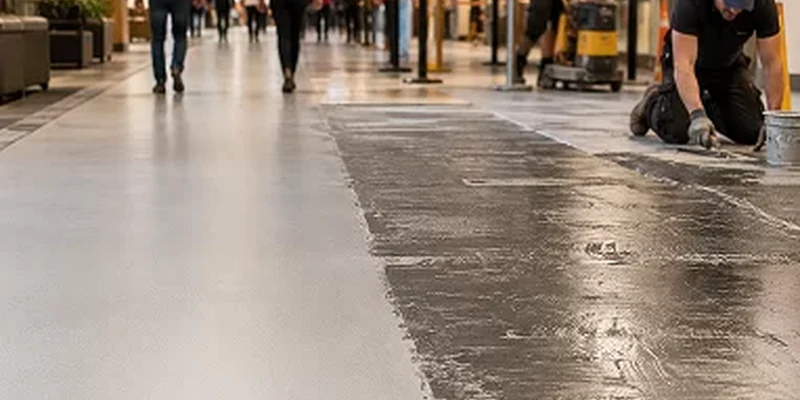
A local patch is reasonable only when the cause is local, the surrounding coating is firmly bonded, the substrate is sound and moisture is within the approved condition. Remove all loose material and extend the boundary to verified adhesion, not merely to the visible edge. Feathering a patch into hollow coating hides the transition temporarily but leaves the original failed bond underneath.
After removal, inspect the fracture surface, test moisture where relevant, correct contamination or weak concrete, recreate the required profile and vacuum thoroughly. The exposed area then needs the approved primer and compatible system layers. A trial repair can confirm adhesion and appearance, but it does not replace investigation where the original failure was widespread.
Full removal is safer when hollow areas extend beyond isolated patches, failure follows multiple layer interfaces, concrete is broadly weak, oil contamination is deep, or moisture remains uncontrolled. It is also appropriate when the existing system, primer or substrate history cannot be verified. Recoating the entire surface without removing the weak layer may improve color temporarily, but the new resin flooring system will still be attached to the old failure plane.
Polymer Terrazzo Floor Coating: How DIMERY Prevents Delamination
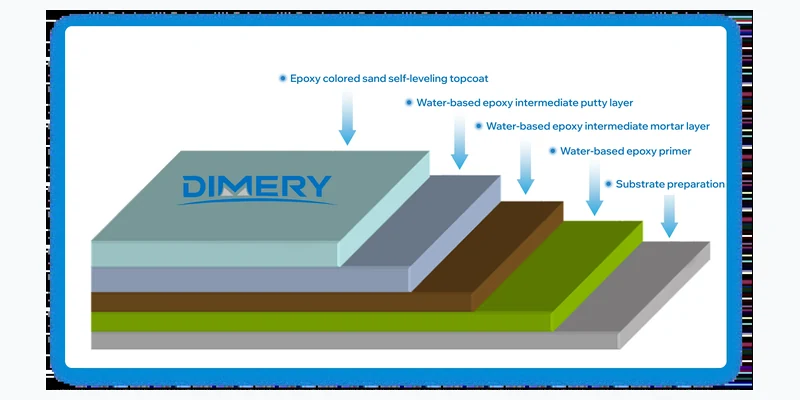
Preventing delamination is a controlled sequence rather than a single primer choice. Before installing a polymer terrazzo floor coating, record the substrate type, concrete age, compressive and pull-off strength, moisture results, flatness, cracks, joints, contamination and existing coatings. Confirm that the prepared surface meets the required profile and that the vacuumed floor is free of weak material.
During installation, use the specified DIMERY primer, intermediate mortar or putty layers and decorative finish as one compatible system. Mix complete packs with the required equipment, respect the working time, avoid thin unsupported edges and keep every layer within its approved preparation and recoat condition. If an intermediate coat has become smooth or contaminated, restore the required surface before continuing rather than assuming the next coat will bond chemically.
Finally, protect the floor while it cures and document the batch numbers, mixing times, temperatures, humidity, dew-point margin, layer completion times and any unusual site event. These records do not merely support quality control. If a defect develops later, they help distinguish a local workmanship issue from slab moisture, substrate weakness or service-related damage. For the full layer sequence, refer to the DIMERY resin flooring installation guide.
Epoxy Floor Peeling FAQs
Can a new epoxy floor coating be applied over peeling epoxy?
Not over loose or unverified coating. All peeling, hollow, weak and incompatible material must be removed to a sound boundary. The remaining coating should only stay when its bond, compatibility and preparation method are confirmed. Otherwise, the new coat will inherit the old failure.
Will a primer stop moisture under epoxy?
Not automatically. A standard primer may improve wetting and adhesion but is not necessarily a moisture-mitigation system. If slab moisture is above the selected system’s limit or rising moisture is active, identify the source and obtain an approved moisture-control design before recoating.
Why does epoxy floor bubbling appear before peeling?
Epoxy floor bubbling can result from moisture vapor, air escaping from porous concrete, trapped application air or environmental conditions. Damp blisters, whitening, mineral deposits and seasonal recurrence support a moisture diagnosis, while small early pinholes over porous concrete may indicate outgassing. The repair depends on which mechanism is confirmed.
Can a localized resin floor peeling repair last?
Yes, when the defect has a limited cause such as a missed preparation area or isolated contamination, and tests show the surrounding floor is sound. A local patch is unlikely to last when moisture, weak concrete or intercoat failure extends beyond the visible damage.
What information should be sent to DIMERY for a failure review?
Provide the project location, installation date, system layers, batch information, substrate type, floor area, service conditions and failure timeline. Include wide photographs, close-ups, both sides of lifted coating, exposed concrete, cracks and joints, plus available moisture, strength and pull-off test records. This evidence supports a more accurate recommendation than surface photographs alone.
Preventing Resin Floor Peeling: Final Project Guidance
The most effective way to prevent resin floor peeling is to approve the substrate and the complete installation process before decorative material reaches the floor. Sound concrete, controlled moisture, mechanical profiling, complete dust and contamination removal, compatible layers, correct mixing, suitable environmental conditions and protected curing all contribute to the final bond.
When delamination has already occurred, diagnose the fracture plane before choosing a repair. Localized failure may be repaired after the cause and boundary are confirmed. Widespread hollow areas, rising moisture, weak concrete or uncertain existing layers normally require more extensive removal and reassessment.
For an old or failed floor, send DIMERY the site photographs, substrate information, test results, service conditions and proposed shutdown period. The technical team can then review the repair boundary and recommend an appropriate floor renovation solution and polymer terrazzo floor coating system.